12 Calorie Sugar Free Gummy Bears Recipe

I love gummy bears!  A few months ago I began experimenting with online recipes for sugar free ones.  There are quite a few recipes, and they all have different thoughts on the sweeteners and flavorings.

I was looking for something specific, a certain texture that would have a very chewy bite and a burst of intense flavor.  Most gummy bear recipes are based on gelatin, which is usually made from pork.  If you’re a vegetarian or vegan, you can substitute Agar Agar for the gelatin in this recipe.  The gelatin is what gives the gummy bears their texture, and how much gelatin you use will determine how chewy they are.  Less gelatin, and the gummies are more like Knox Blox; more gelatin, and they’ll have a rubbery texture with more resistance to the bite. (The more gelatin ones also bounce like crazy, which is fun!)

In my experiments I tried a number of flavoring options: sugar free Jello, extracts like vanilla or anise, flavored hot teas, and powdered single serving drink mix.  These flavorings all affect not only the taste, but also the texture.  There was one experiment however, that gave me exactly what I was looking for: liquid water enhancer!

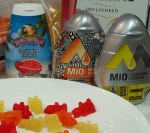
flavorings-1These liquid water enhancers are the kind that you squirt into your water bottle so that you can control the intensity of the flavor of your water.  Mio was the first brand on the market, but there are a lot of other brands (including house brands) that provide a wide range of not only flavors, but also options like caffeine and vitamins. The sweeteners vary from brand to brand, aspartame to sucralose to stevia, so you have your choice about which sweeteners you prefer.

12 Calorie Sugar Free Gummy Bears Recipe

  • Servings: 12 servings of 25 gummies each
  • Difficulty: easy
  • Print

Ingredients:

  • 1 tbsp liquid water enhancer, any flavor
  • 2/3 cup of very cold water
  • 7 packets unflavored Knox gelatine

Tools you’ll need:

  • small sauce pan large enough to hold a glass measuring cup
  • 2-cup glass measuring cup
  • fork
  • spoon (one with a more pointy tip works best)
  • Silicone candy molds (Gummy bear one at Amazon)

Directions:
Fill the saucepan half full with water and place it on the stove with the heat set to medium-low (3.5 on my electric burner). Pour the tablespoon of liquid water enhancer into the glass measuring cup and add 2/3 cup cold water. Stir well.

Add all 7 packets of unflavored Knox gelatine to the liquid. Do this quickly, as the gelatin will begin to absorb the water immediately and gel within less than a minute. Stir well, making sure to scrape down the sides of the measuring cup. The gelatin will set into a firm mass. Set your timer for 10 minutes.

After the timer goes off, carefully lower the measuring cup into the pan of hot water. The gelatin will begin to melt and after about 10 minutes or so (depending on how high your heat is), the gelatin will return to a liquid state. It will resemble a thin syrup in consistency. There will be a skin of foam on the top, and you can either stir that back into the melted gelatin or skim off the top. It’s up to you. The foam makes for a slightly softer gummy (and makes more gummies per batch) while removing the foam makes for fewer gummies but slightly firmer ones.

Begin carefully spooning the melted gelatin into your gummy molds, filling them to just below the surface of the mold. If you only have one mold like I do, it will take 4-6 batches of gummies to use up all the liquid gelatin. Keep the leftover gelatin warm on the stove in between batches. The gelatin will get a thin skin on the top, and just break the skin and tip the glass to allow the melted gelatin to be accessible.

Chill the molds in the refrigerator for 10 minutes, then remove the chilled gummies. Store gummies in sandwich baggies in the refrigerator. Do not freeze, and do not store at room temperature. The gummies will last a week in the fridge, although I’ve never tested that personally because I eat them all before that time!

Nutrition Information:
Calories: 12 per serving of 25 small bear-sized gummies
Protein: 5 grams (but keep in mind that gelatin is an incomplete protein)
Carbohydrates: 0
Fat: 0
Sugars: 0

There’s a lot to be said about getting gelatin in your diet, and while I don’t have room in this post to share about it, you can Google the benefits of gelatin and it may just convince you that you need a daily dose of 12 Calorie Sugar Free Gummy Bears in your life!

Finally, a Great Tasting Low-Carb Bread!

If you’ve followed any of my food exploits you may have heard me mention Laura Dolson of the about.com network.  She runs the Low Carb Diets section, and she’s shared a truly wonderful recipe:

20160109_180212

This recipe makes delicious garlic bread

Foccacia-Style Flax Bread.  Let me tout the wonders of this bread and why I love it:

–It is super easy to make. Mix, pour, bake.
–It holds up to use for sandwiches, grilled cheese, and pizza. And garlic bread. And french toast. And regular toast. And anything you could think of to use sliced bread for. Not very crumbly at all.
–It doesn’t taste like a sponge. Or cardboard. It tastes kinda like a really nutty cornbread. But moister than cornbread and doesn’t fall apart when you pick it up.
–It’s high in fiber! 5 grams per slice.
–The recipe itself is super versatile. You can make savory or sweet, as bread or muffins, etc just by changing what flavors you add to it.
–It’s very low-carb. Literally 1 net carb per slice. Plus 6 grams of protein, so a sandwich has an additional 12 grams of protein in it!
–It’s a great way to eat eggs if you don’t like eggs. Eggs are great protein but… well, I’m not really that fond of them by themselves.

20160111_190036

pizza with flax crust

So a couple things I’ve learned:
–Definitely DO plan on using some spices or flavorings in the recipe. By itself it’s a little bit flax-y. Which is fine if you like that flavor and all. But if you aren’t used to it, then it’s a little weird. So add onion, garlic, paprika, salt, pepper, or Italian or Greek seasoning, or grated parmesan, or anything that strikes you.
–Definitely do use GOLDEN flax seed, not the darker flax. It lightens up the flavor of the bread so that it’s less like canned brown bread or rye bread, and more like a mild cornbread. Unless you like those stronger flavors, of course!
–Make sure the flax you use is finely ground and nowhere near it’s sell-by date, and not in a see-through bag or container when you buy it at the store. Air and light are flax’s worst enemies.
–Store any unused flax in the freezer in a sealed container or ziplock freezer bag, as it has a short shelf life once it’s opened, even in the fridge. If you smell it and it smells fishy at all, then it’s rancid. The oils in the flax go bad easily, so I don’t recommend buying it in bulk from the health food store’s bulk food area because it’s likely rancid already.
–To give your flax a finer texture, you can run the ground flax through a coffee grinder. This makes it almost flour-like.

Have you tried this recipe?  I’d love to hear any variations you have used with this recipe, too.

How To Build A Portable Tiki Bar

I love Tiki Culture/Polynesian Pop.  It was a loosely island-influenced decorative style, popular in the 1940’s to 1970’s.  The Beachcomber, Trader Vic’s, Disney’s Polynesian resort and Enchanted Tiki Room — these were all Southern California destinations that popularized the movement.  People were turning their spare rooms into tiki lounges; motels had sweeping peaked roofs and imitation thatch; restaurants were investing in rattan and bamboo.  Tiki bars were popular across the country.  Hawaii became a state in 1959, and by that time the islands had already been growing in popularity as a tourist destination. Gilligan’s Island, Elvis’ Blue Hawaii, the theatre production and then film, South Pacific– these were all tv shows and movies that embraced this loose interpretation of Island Life.
I just turned 50 years old, but I certainly don’t feel my age.  I lost a bunch of weight in the last few years, started eating better, lifting weights and exercising, got into the sport of disc golf.  It has made me stronger and healthier than I’ve been my whole adult life.  So I wasn’t interested in having the traditional “over the hill” party.  No way!  What I wanted instead was a luau.  A luau with a tiki bar.

I did some searching online, and what I discovered is that homemade tiki bars fell into basically one category:  permanent structures.  They may have wheels on the bottom to re-position them, but that isn’t what I wanted.  I don’t have the room for something that big to stay up all the time.  What I wanted was something portable, that would fit on a tabletop, and then be stored away when not in use.  There are the cheap ones you buy at party supply stores, but they’re flimsy and won’t hold up to windy days outdoors.

tiki-bar-finishedSo my husband and I came up with a design for a 4-legged frame with a slight pitch to the roof, a canvas top with imitation thatch around the edge, and it fits on top of a standard Rubbermaid 6-foot long table.  We raised the legs of the table with pvc pipe and wrapped the table in this wonderful basketweave vinyl tablecloth material from a fabric store.  Add some decorations and appropriate drink paraphanilia on top, and voila!  Instant tiki bar.

So here’s how you build it:

You’ll need 1×2 furring strips, and either spend a little extra for the smooth ones or spend elbow grease yourself to sand them down.  Two of the furring strips get cut at 54″, two at 48″, and one at 68″.  You’ll also need 1×6 boards, two cut into 68″ lengths, and two cut into 28″ lengths.  You’ll also need 18 bolts and wing nuts, and 36 washers.  10 of the bolts will be 2″ long, and the other 8 will be 3″ long.  It’s wise to have extra washers and wing nuts, as these easily get lost when they’re dropped!

You’ll want to stain the wood; we found a discounted stain at the hardware store, and it was fine.  Almost didn’t matter what color, as long as it was neutral.  You’ll use less than a pint of stain.  You’ll want an expandable lattice fence section for the roof, self-securing velcro, a 68×30″ piece of white canvas cloth, two packages of deck fringe from a party store, assorted decorations, and a piece of basketweave flannel-backed vinyl (by the roll) in a 15 foot length.

tiki-bar-signIf you create a Tiki Bar sign, you’ll want a thin (1/4 to 1/2 inch) piece of wood, 54″ long and 6″ wide.  You’ll stain this and then paint the Tiki Bar sign on it using acrylic craft paints.  You can use Microsoft Publisher to create a banner, and use the “Ravie” font to create the sign.  Then either scribble with pencil on the back or use carbon paper to transfer the outline of your letters onto the board.

I’d recommend painting the letters white at first, to give them a base coat and allow the brightness of your other colors to shine through.  The darkness of the wood will make the letters harder to see if you don’t have a base coat underneath.

I added some floral decoration on the board, but you can do any design you want, just following that same instruction to print out what you want to do, and then trace it onto the board.  (Although, I admit to freehanding the flowers and leaves here.)

tiki-bar-frameTo assemble the tiki bar frame, drill holes into the furring strips as such:  two holes going through the face of the wood, and two holes in the side, offset from the first two so that they do not intersect.  The 54″ furring strips will have their facing holes set 7″ down from the top, and the 48″ furring strips get their holes set 1″ down from the top, so that the box of the frame is level all the way around.

This image shows how the boards are assembled.  The 68″ 1×6 boards stick out, whereas the 28″ 1×6 boards are inset.  They screw to the sides of the furring strips, which is why the screws are offset from the ones holding the long boards.   Do you see how the expandable lattice fencing sagged? The 68″ furring strip gets screwed to the top of those 54″ ones, to support the back of the roof.  Then we simply used the velcro on a roll that sticks to itself (soft furry on one side, stiff loopy on the other) and cut strips of it to anchor the lattice to the support board at the back.  Decorations that are hung by twine get attached to the lattice in the front, thereby anchoring the lattice to the frame at the same time.

tiki-bar-table-skirtThis piece of flannel-backed vinyl by the roll was the most expensive investment in the whole tiki bar.  But the effect it gives and the portability was completely worth every penny.  Normally it’s about $30 a yard, but I was able to use a 60% off coupon.  I had to trim 24″ off the length, and now I have alot of very attractive, sturdy vinyl to use for other projects (more than likely, you’ll see that vinyl show up in this blog again).

So onto decorating:  This deck fringe really makes the difference in how the table looks, and gives it that island vibe.  I also used the fringe on the edge of the canvas for the roof.  It wasn’t cheap– $20 at the party store.  But you can also find it online for around $16.  What’s on top of the table is a straw grass beach mat, the same kind that you’d put underneath your towel at the beach.

tiki-bar-finishedHere we are fully assembled.  Let me tell you:  I completely fell in love with double sided duck tape.  I didn’t use a whole roll, but I’m sure that stuff will become a staple in our garage.  It’s wonderful, excellent… okay, okay.  You get the picture.

A bit of advice when attaching your decorations:  If it’s going to be permanent, use the double-sided.  Like for the fringe on the canvas.  But if it’s not permanent, like the fringe on the table, then use regular duck tape, folded into a loop.  With the deck fringe, you’ll want to put a layer of tan duck tape all along the length on the inside top edge, because even though it’s sewn and pretty sturdy, you don’t want to be repeatedly pulling tape off of it.  It’ll begin to get ruined with just a few uses.  So placing a layer of duck tape on the back of the border to support the fragile plastic that the fringe is made of, and then sticking your loops of tape to that duck tape layer, will preserve the fringe for many, many uses.

We hit the dollar store in June, and they always have luau themed decorations and party ware there.  The same thing with the party store.  Awesome tiki cups, napkins, stir sticks, coasters, etc.

Something we discovered about this setup: if you change the decorations, you change the theme– and yet still have a portable bar.  So if you remove all the Hawaiian imagery and the Tiki Bar sign, then you could add whatever holiday decor you’d like and still have an awesome portable bar.  You could try decorating it for 4th of July, or Halloween, an adult beverage area for a birthday party, etc.  Just use a little imagination and judicious application of holiday decor, and this becomes a focal point in your celebration.

tiki-bar-parkFor my 50th birday party, we went to a park that offers alot of activities for kids and adults.  Since this was a public park, no alcohol was allowed, so we created a list of tropical-themed drinks that our guests could have, that stood the spirit of the party and yet comply with the park’s rules.  Our guests had fun pretending to be a bartender at a tropical resort, and that freed us up from having to prepare everyone’s drinks.  I found some of the drinks online, and created some myself (I felt like a mad scientist, saying to Allen “here, try this!”). I had this list on a clipboard and they were able to try a variety of drinks throughout the event. Don’t forget to buy little paper umbrellas, pineapple chunks, maraschino cherries, and lemons/limes/oranges/mint for garnishes.

tiki bar drink list jpg


Freezer Meal Party, 4-13-2015

In the fall of 2014 my daughter, daughters-in-law, and I decided to have a meal exchange and help each other have some pre-made meals in the freezer. That was a huge success, and in the winter of that year we did a Full-Blown Freezer Meal Party.   

Again, it went over really well, and there were so many times we were grateful to be able to not have to cook but to just pull something out of the freezer.  it was also really economical!

My husband’s parents and siblings are coming for a visit in May, So we went at it again, revised our processes a little bit, and changed up the menu.  A couple of things that we really raved over last time– the honey mustard chicken and the Italian meatballs– were reprised in this this Freezer Meal Party for April 2015.

For a total cost of $56.94 per family, and an average main dish costing $3.79, we came away with 15 main dishes to put in our freezers.  We shopped very frugally, taking advantage of Aldi for most of the food, and then Gordon Food Service for the meats and freezer containers.

These are the meals and their corresponding recipe links:

6 packages of High Fiber Italian Meatballs (recipe below)

3 packages of Honey Mustard Chicken

2 Packages of Pulled Pork Barbecue (unpublished family recipe; similar to this one)

2 pans of Taco Bake casserole

2 pans of Loaded Baked Potato casserole

ingredients-allshopping-listThis is what all the ingredients look like, spread out on my kitchen table.  Enough to make 15 main dishes for 5 families of 4.  Granddaughter not included.  😉  And our shopping list.  We’d forgotten to take a picture of it before crossing things off the list at the store.

loaded-baked-potato-casseroWe learned alot about doing the foil pans assembly line style.  The taco bake and the layered baked potato got that treatment, getting each layer put in at the same time rather than filling one pan before moving on to another.  Cooking 6 pounds of bacon for the loaded baked potato and the honey mustard chicken took a surprisingly long time.

honey-mustard-chicken-4Speaking of honey mustard chicken, our oldest granddaughter (3 years old as of this writing) got her first taste of working a freezer meal party.  She helped stir the sauce with her aunt supervising, and helped wash potatoes with me supervising.

honey-mustard-chicken-3honey-mustard-chicken-2Oh, the sauce.  This stuff is addicting.  Incredibly simple, just yellow mustard and honey.  But such complementary flavors.  Because the chicken is put in the sauce raw, it marinates and offers the versatility of different methods of cooking this dish, all equally easy:  crock pot, stove top, or oven.  It can be served alone or over rice, pasta, vegetables– you name it.

Next was the Italian meatballs! We found this one to be also extremely versatile, and something that in spite of the seasoning marking it as an Italian dish, it’s mild enough that it can be introduced into a variety of sauces.  Savory sauce, ketchup, marinara, and even french onion soup.

mixing-meatballs

rolling-meantballs

I’ve been adding more fiber to my diet lately, and one of the staples for that is steel cut oats.  My daughter had wondered if replacing the cracker crumbs in the meatballs with oats would achieve two goals:  one, improving the fiber in the meatballs, and two, I’m gluten sensitive so avoiding wheat products when I can is a good thing.

Here’s the recipe for the meatballs:

Servings: 4

1 pound ground beef (we used 80/20)

1 pound ground pork sausage

2 whole large eggs

1 cup steel cut oats, dry

2 tbsp Italian seasoning (more or less, to taste)

Salt and pepper, to taste

Optional to add even more fiber:  chia seeds, ground flax seeds, etc.  Just add more egg to the mix to keep the meatballs from getting dry and crumbly.

tools:  wax paper or freezer paper, a 1.5 – 2-inch cookie scooper, broiling pan, and paper towels

Directions:  mix the eggs and oats (and optional ingredients, if desired) together well, and set aside for about 30 minutes.  This allows the oats to soften a bit and makes their chewy texture a little less obvious in the finished meatballs. While that mix is sitting, it’ll create some bubbles.  Just give it a stir, it’s not a problem at all.

Meanwhile, mix all the rest of the ingredients together in a very large bowl.  After the 30 minutes is up, add the egg and oats mixture to the meat, and stir it all together very well.  It’s easiest to do this with your hands!

Use the cookie scoop to gather up some of the mix, and level off the scoop.  You can drop this right onto your broiling pan if you want, but the meatballs won’t be totally round that way.  It’s up to you.  Otherwise, release the scoops of meat mixture onto the wax paper or freezer paper so that the scoops can be rolled between your hands to form consistently round balls.  Place the balls on your broiling pan, directly over the drip holes.  Now if you don’t have a broiling pan, a cookie sheet or any baking dish will work just fine!  But keep in mind that the meatballs will make some grease as they cook, and that will likely float around in your flat pan.  On the one hand it’s gross, but on the other it also keeps your meatballs from getting dry.  Either way is up to you.

Bake your meatballs for 30 minutes at 350 degrees Fahrenheit.  Drain them on paper towels until cool, and then pack them in a ziplock bag for the freezer.

completed-meals-allhoney-mustard-chicken

After all of our freezer meals were finished, this is what they looked like.  First is the large batch that is everyone’s meals laid out together.  The second photo is of what each person took home.


Oldest daughter in law made some labels for us, and created printable photos!

Honey Mustard Chicken labels

Loaded Baked Potato casserole labels

Taco Bake labels


Freezer Meal Party, 10-7-2014

In the fall of 2014, my daughter, daughters-in-law, and I decided to do a meal exchange.  Each of us would make 4 copies of the same main dish (one for each person in the exchange).  This exchange went over really well with our families, and it was nice knowing we’d have a few pre-frozen homemade meals that we could use on days when we didn’t feel like cooking.

A few months later, we decided to up the game a bit, and have a full-blown freezer meal party.  But this time, we’d do all the shopping and preparation together, in one day.  Everyone would get some of each item, same as before.  But instead of only 4 meals, we’d do 17.  Triple the work!  But also more economical. It cost us only about $110.00 per person for the 17 meals.

Each person received the following main dishes, with 4 servings each:

3 turkey breads

3 sausage cheese breads (unpublished family recipe; similar to this one)

2 honey mustard chicken

3 shredded pork barbecue sandwich filling (unpublished family recipe; similar to this one)

3 lasagna (unpublished family recipe; similar to this one)

3 Italian meatballs (unpublished family recipe; similar to this one)

bread-dough-rising

For the turkey and sausage bread loaves, we started with pre-made frozen bread dough.  It’s cheaper to make your own, but for the sake of time and doing all the prep for the meals in one day, we bought the pre-made ones.  Follow package instructions for thawing and rising.

turkey-bread-fillingFor filling the breads, you’ll want to roll them out with a rolling pin, then add your fillings and seasonings. Don’t forget to add lots and lots of cheese.

Fold the sides in lengthwise and pinch them together to completely seal the edges.  Then carefully flip each loaf over so the seam is on the bottom (it’s easier to do with two people). Then add whatever toppings you want on your bread.  The turkey bread uses butter and garlic, yum!

sausage-bread-sealing

turkey-bread-risingHere’s what a dozen turkey breads look like…

After the glaze is on, you’ll want to fold the aluminum foil up around the bread and seal it closed.  Then place each loaf in a 2-gallon ziplock bag to put in the freezer.  This way, the loaves don’t stick together, and you can remove only as many loaves as you need because they’re individually wrapped.

crock-pots-porkThe pork barbecue was the only thing we purchased and started cooking the night before.  We bought pork loin instead of pork butt or shoulder, because it’s leaner.  Just throw it in the crock with some water and onions, turn it on to low, and forget about it for the next 12-14 hours!  The pork just about shreds itself, and all you have to do is drain off any excess liquid (which would make an excellent stock for pork gravy) and add your favorite barbecue sauce.

filling-pork-bagsWe figured the quart freezer bags would be easier to fill if we did this, and it worked great! All you need is a large container that’s taller than it is wide.  Then you can measure the amount of pork filling you want for each bag.  We figured about 3 cups per bag– which is really alot more than 4 people will eat in a single meal, but it makes good leftovers for lunch the next day.  It’s also great for last-minute company.

forming-meatballsThe Italian meatballs went over with our families like gangbusters!  It’s a super simple variation on meatloaf but very versatile. You can add all sorts of sauces to it, anything from savory sauce to marinara to French onion soup! We used a cookie scoop to get evenly sized meatballs, and then baked them in the oven to cook them before freezing.  That makes it easy to just pop a few in the microwave when you really want a filling snack.

baked-meatballs-coolingmeatball-scooper

We did have a little trouble finding an appropriately-sized scoop.  Most of the ones we found were too big.  You want one that’s about 1.5 inches in diameter, maybe 2 inches at the most. Ice cream scoops don’t work as well for this, so keep that in mind.

honey-mustard-chicken-2The honey mustard chicken is another recipe that’s become a favorite with everyone.  Preparation is super simple, and because there isn’t a need to cook anything besides the bacon (or you could use precooked bacon bits for that, if you wanted to), it’s a really quick meal to prep for the freezer.  Just make sure to keep your cheese and bacon separate from the sauce, so that they can go on right at the end of the cooking.

marinara-sauceThe lasagna was next, and we worked the preparation in assembly-line fashion.  First the sauce!  We make our marinara from scratch, which also gave us the bonus of some leftover quart freezer bags of sauce to have for spaghetti.  We could also tailor the sauce to taste and for salt content, which is alot healthier for you.

layering-lasagneWe lined up all the lasagne pans and each person had a job to do, whether it was laying the cooked lasagne noodles, spooning in some sauce, or adding the cottage cheese/mozzarella mixture.  Doing it this way, we were able to make a dozen lasagna pans very quickly.

freezer-meals-stackedWhen everyone was finished, this is how much room it took up in an average freezer above the refrigerator.  It’s surprising how much room is left, because the containers we chose were all similar sized and easily stackable.

We have done another Freezer Meal Party since this one back in December of 2014.  You can take a look here and see how we made 15 family-sized main dishes for $56.94!

White dove cane

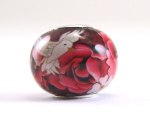
Here’s a new cane, a white dove.  Made it from a 50/50 mix of Premo and Fimo.  I think it came out really well. Though reducing a cane in a rounded triangular shape was a challenge!  The last photo is a Pandora-sized bead I made using the dove cane and the red rose cane I’d made a few weeks ago.

white dove


cane841


rosepandora1


Beginner Pirate Sushi recipe

Yar, Mateys!  Thar be plenty o’ fishes in th’ sea, me darlin’s, so here be a lesson in makin’ yer own sushi.  If yer ever visited a sushi bar in port, then ye knows how ‘spensive it can be!  Makin’ yer own, it not be hard, even if ye never tried it before.  And, it don’t hafta be made with raw fishes if’n ye don’t likes that, so’s doncha worry, Lads and Lasses.  Yer welome ter use cooked shrimps or cooked imitation crab legs in it, instead. Sushi can be gluten-free and dairy-free, too, fer those of us wit’ sensitivites an’ such.  It be a healthy food, too!

Now this be a long post, but don’t let that intimidate ye!  I’m givin’ ye lots of explanations so ye know the why an’ wherefore of what yer doin’ not just th’ how. Once ye read through all this, ye will have a good basic understandin’ of it.  Even so — keep in yer mind that this sushi takes less than an hour to prepare.  That’s it! Just one hour.

Thar’s some supplies ye be needin’ from th’ stores, now.  If ye has none o’ these, then it can be a mite ‘spensive an investment.  But the supplies an’ such will pay for themselves over time, in th’ money ye saves from not havin’ ter be eatin’ sushi out if ye be a sushi lover.

If ye happen ter weigh anchor in an Asian port, yer more’n likely ter find these supplies easily — but if’n yer not near any such landfall, doncha worry none.  Amazon be a wonderful port o’ call and magically always nearby, and sometimes cheaper’n the store, ‘specially if ye have Prime, so compare prices afore ye shop.

Prep time: 60 minutes (includes cook time for rice, brining for fish, etc.)
Servings: 2-4, depending on the size of your rolls and whether you make side dishes to go with the sushi (miso soup, etc)

Reusable Supplies:
Sushi Rolling Mat (they be inexpensive an’ yer can find ’em at Asian food stores or here).
Flexible plastic cutting mat (found at most grocery stores, looks like this).
Heavy saucepan with a tight fitting lid -OR- an electric rice cooker (preferred, mine looks like this).
Wooden spoon -OR- paddle (preferred, often in a set with wooden spoons.  Very inexpensive, look here).

Cookie sheet -OR- flat-bottomed wooden salad bowl (bamboo preferred, looks something like this, which includes the wooden paddle).
Chop sticks if you prefer not using your hands to eat your sushi (this is a nice set, inexpensive, and includes the wooden paddle).

Hand towel (or kitchen towel, yer likely ter have at least one o’ these).
Sharp kitchen knife (carving knife style preferred, but you can use anything you have.  Make sure its very sharp).

Cup of cold water and a fork.
Small cups like jello shot cups, Dixie portion cups with lids, silicone cupcake pan liners, etc, one per person.  These are at grocery stores.

Saucers or small plates, Something to put your ingredients on individually.

Gallon Ziplock bag or non-metal bowl with lid or plastic wrap (optional, for brine)

Ingredients:

1/4 lb. Fish of your choice (raw or not; raw would be tuna and/or salmon*, most commonly; not raw would be cooked shrimp or imitation crab legs).

1 each of these Vegetables, any combo of: cucumber, green onion, celery, avocado, carrot, daikon — julienne cut (How to julienne: here).

1 Cream cheese block (optional), cut into long cubes; half-frozen helps for cutting, found in grocery stores.

1 Extra firm Tofu (optional), cut into long cubes, found in grocery stores or Asian markets.
1.5 to 2 cups Sushi rice (short or medium grain only; common brands are Calrose, Kokuho, Nishiki, found at large grocery stores, Asian markets, or here).

10 Tbsp Seasoned rice vinegar (found at large grocery stores, Asian markets, or here).

1 pkg. Nori (seaweed sheets, can be found at large grocery stores, or here).

1 cup each Sake and Mirin (optional, for seasoning raw fish; can be found at large grocery stores, Asian grocery, or you can use this, here).

1/4 cup Kosher salt (optional, for brining raw fish; can be found at large grocery stores).

2 Tbsp. Sugar (optional, for brining raw fish; can be found at grocery stores).

2 cups ice (optional, for brining raw fish).

Soy sauce for dipping (regular or gluten-free, can be found at large grocery stores, Asian markets, or here).
Unagi sauce for dipping (can be found at large grocery stores or Asian markets, or here).
Wasabi for dipping (paste or powder, NOT mustard! Can be found at Asian grocery, or paste here and powder here.).

*About raw fish:  You really want the highest quality in your Tuna and Salmon that you can get.  You’re only buying about 1/8 pound per person, so you won’t buy a lot unless you plan on cutting and freezing it yourself.  Ideally, get your fish at a seafood market.  But if you don’t have access to that, or it’s too expensive, then your local fish counter at a large grocery store will do.  Again ideally you want it as fresh as can be, and the fish market will usually have fresh caught salmon at least.  Get wild caught, not farm raised, and get “grade A” or “sushi grade” if you can.  If not… get what you can get.

The fish counter at the grocery store is most likely gonna have “previously frozen”.  Ask them to cut you a thin slice so you can feel it.  You want to do this to ensure the fish you buy is NOT slimy, mushy, or sticky.  If so, don’t buy it!  The fish should feel firm, moist but not slimy, and if you squeeze it a little bit it shouldn’t mush in your fingers, it should have some springy-ness to it.  It should smell fresh, not sour or “fishy”.

We will be putting the fish in a brine.  This doesn’t really cook the fish, but… sortof.  It kills off any yuckies that might exist on the fish, has a preservative quality to it, firms up the fish, and gives it more flavor. Then we’ll be putting it in a sake & mirin mixture to marinade it.  OMG. So good.

Directions:

Sushi’s all about dat rice, ’bout dat rice, ’bout dat rice….  ….*ahem*…..

The number one important thing about your sushi is your rice.  Not your fish.  Make sure you have that firmly in mind!  If you think of Sushi as sortof a Japanese version of a sandwich, then you can wrap your brain around the idea that the fillings will come and go, but the bread (or in this case, rice) is what ties it all together.

Now there are different kinds of sushi and we could discuss those ALL DAY.  But today is a basic introduction to what is called “Maki” and it’s what most people think of when they think of sushi.  There are different kinds of Maki, but what we’re gonna focus on here is called “Futo Maki”, which is a roll that has Nori on the outside, and rice, vegetables, and fish (or meat) on the inside.  Remember:  Japanese sandwich.  Just in a jellyroll form.  Got it?  Okay.

Step 1.  Start your brine, if you are doing Tuna and/or Salmon rolls.  (If you are not doing raw fish, skip to step 2)
In a medium sized non-metal bowl or gallon ziplock bag, mix together the following except ice:

4 cups water

1/4 cup kosher salt

2 Tbsp. sugar

2 tsp. Seasoned rice vinegar

2 cups of ice

Stir until the sugar dissolves, then add ice.  Trim away any skin and fat from the raw fish, if any.  Then add them to the bowl.  OR, you can upgrade your sushi by lightly scoring the top and bottom of the fish fillets with a very sharp knife, in a shallow crisscross pattern, before placing them in the bowl or bag.  This allows more of the brine (and later seasoning) to get into the fish.  Just don’t cut deeply or it’s gonna be hard to slice the fish later. Place the bowl or bag in the refrigerator for 40 minutes.  (Ideally, you’d do this overnight.  But if you’re like me and usually decide you want sushi at the last minute, the short brine time is fine.)

Step 2:  Make the rice

Measure the amount of rice according to the directions on the package, and place it in your pan or rice cooker.  Swirl lukewarm water into the pan, and rinse the rice 3-4 times.  If you have a fine mesh colander, you can do this better but using a pan is fine.  Just be careful when pouring off the water.  This rinsing removes excess starch (yay!) so that the rice doesn’t end up too sticky.  Ideally, you can upgrade your rice by setting the rinsed rice aside for an hour to drain.  But I rarely do this because I rarely plan that far ahead when making sushi.

Add the amount of water that your rice package calls for, and then turn your rice cooker on or bring your rice to a light boil in the heavy saucepan on the stove.  Once the pan boils, turn it down to low and put the lid on tight.  Cook for 20 minutes or the time the rice cooker uses.

Step 3:  While the rice is cooking…
–Julienne your vegetables and place on a divided tray or saucers

–Cut your tofu and cream cheese into long cubes, add to tray or saucers

–Prepare your table (this is how I prepare mine, for two people.  Everyone rolls their own sushi, makes the process go much faster).

Step 4: Marinade the fish and season the rice:

Prepare this marinade for the raw fish: equal parts Sake and Mirin.  Stir a bit, place in another plastic bag or non-metal bowl.  When the timer goes off for the fish, take them out of the brine and rinse well under cool water.  Then transfer them to the marinade and return the bowl or bag to the refrigerator until just before you’re ready to make your rolls.

When the timer for the rice goes off, remove the rice from the heat (do not let the rice cooker go to warm; turn it off).  Remove the lid, then place a clean dish towel or kitchen towel over the pot, then place the lid back on top.  This will help absorb excess steam.  Set your timer for 15 minutes.

After the timer for the rice goes off, pour 1 Tbsp. seasoned rice vinegar into the wooden bowl and spread it around the sides and bottom with a paper towel so the hot rice doesn’t stick to the bowl.  Then gently loosen the rice from the pot or rice cooker by cutting and folding the rice with the paddle.  DO NOT STIR.  That’ll make the rice sticky and messy.  Pour the rice into the moistened bowl, then pour in 6-7 Tbsp. of seasoned rice vinegar over the rice.  Fold that into the rice, again without stirring. Once the rice vinegar is mixed in, fan the rice for a minute or two to speed up the cooling process.  Ideally you want the rice to be room temperature.

Step 5:  While the rice is cooling…

–Take the fish out of the marinade and pat dry.  Slice the fish as thin as you can with a very sharp knife, going across the grain. Place slices on a tray.
–Mix your wasabi and soy sauce, if you like them mixed together.  Wasabi paste and powder are very hot to the taste, but the heat is short lived.  That being said, a little does go a long way.  If you’re using paste, start with a small amount of soy sauce into the bottom of your dipping cup, then add small bits of wasabi and stir to taste — you may even want to do this with a toothpick if you don’t like things very spicy!

If you’re using wasabi powder, then mix a tiny amount of water in with the powder until a thick paste forms.  Then follow the mixing with soy sauce procedure.

Of course if you don’t like wasabi at all, you can completely skip that part and just use the unagi sauce (sweet tasting) and/or soy sauce. Personally I use them all, and I like my wasabi dipping sauce hot enough to make me catch my breath and my eyes water.

Step 6: Make your sushi rolls

This is an excellent video on how and why to roll sushi the different ways.  My only caveat is that I’m trying to keep my carbs down, so I use about half the rice that is usually done.  I spread my rice out with a wet fork (hence the cup of water with a fork on my table setting).  Also, I usually roll mine with the rice on the inside and the Nori on the outside.  It’s just a lot less sticky and messy that way, IMO.

Once you’ve made your first roll, use the sharp carving knife to slice the roll into 4-6 slices.  (Dampen a paper towel and wipe the blade before and after you slice, that makes it alot easier to cut through the Nori.)  Generally I make and eat my rolls one at a time.  I’ve learned from experience that my eyes are often bigger than my stomach, and I get filled up on about 3 rolls (and that’s including me using half the rice most people use).  Sushi is surprisingly filling– so there’s no waste if you make and eat your rolls one at a time.

Let me know if you make your own sushi, whether it’s for the first time or if you’ve been making it for years!
Red Rose Cane

I’m back to making canes!  This is “Cane 840”.  I keep a photo of every cane I make, and just number them rather than giving them all names.  That makes things easier for when I do remakes like this one — this is a remake of a cane I made back in 2005.  It was one of my favorite designs, and I decided to bring it back.  I’ll be making this cane in other colors — pink, white, and purple.  I do sell my canes, and you can find this one in my etsy shop.

antique rose
cane840

Take Online Classes From Me

I’m so excited to be announcing this!  Starting in January 2015, you can take an online class from me and 21 other polymer clay instructors through the Virtual Retreat at Polymer Clay Adventure.  That’s 22 classes for only $99, and you can take those classes all year long!  Talk one-on-one with the instructors, share your projects– it’s like experiencing a real retreat without having to leave your home, and at a fraction of the cost of attending one in person.

FBglobebanner


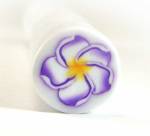
cane828I’ll be teaching my newest flower cane, a Frangipani Cane.  This design is quickly becoming a favorite of mine, and it’s something even a beginner can make.  Use the cane to decorate crochet hooks, light switch covers, wine glass stems, silverware handles— anything that strikes your fancy.  Lots of lovely floral projects can be made with this cane and you’ll find that you return to it again and again.

Win FREE Merchandise!

Lately I’ve just been coasting with polymer clay.  No real highs, no real lows… just:  well, I had other things on my mind.

I was talking to my #1 daughter-in-law the other day, and she just asked me a bunch of questions about how I was doing with my clay.  My answers kindof surprised me– I didn’t realize I’d slid into a bit of a rut until I heard it coming out of my mouth.  She’s a pretty perceptive chickie, and she gave me a few suggestions that really got me motivated again.  Most of those things surrounded reconnecting with the people who clay.  That’s really where I get my energy from.  Sharing stuff we’ve made, talking about this project or that Pintrest pin, etcetera.

So as I mulled over what she said, I decided to do something I’ve never done before:  have a giveaway.  And thinking about it and doing some research about how to do a giveaway actually got me pretty excited.  It’s a fun way to reconnect and just restarted my motor, plus some lucky soul gets to spend 25 bucks shopping in my store.  I can’t wait to see who wins!

cane-giveaway-1

Previous Older Entries